Document Feature Overview
Make sure to watch this video first, as it will give you an idea of the overall structure of the document feature and some of its capabilities. Then, see the videos below for more detail on specific aspects of the feature.
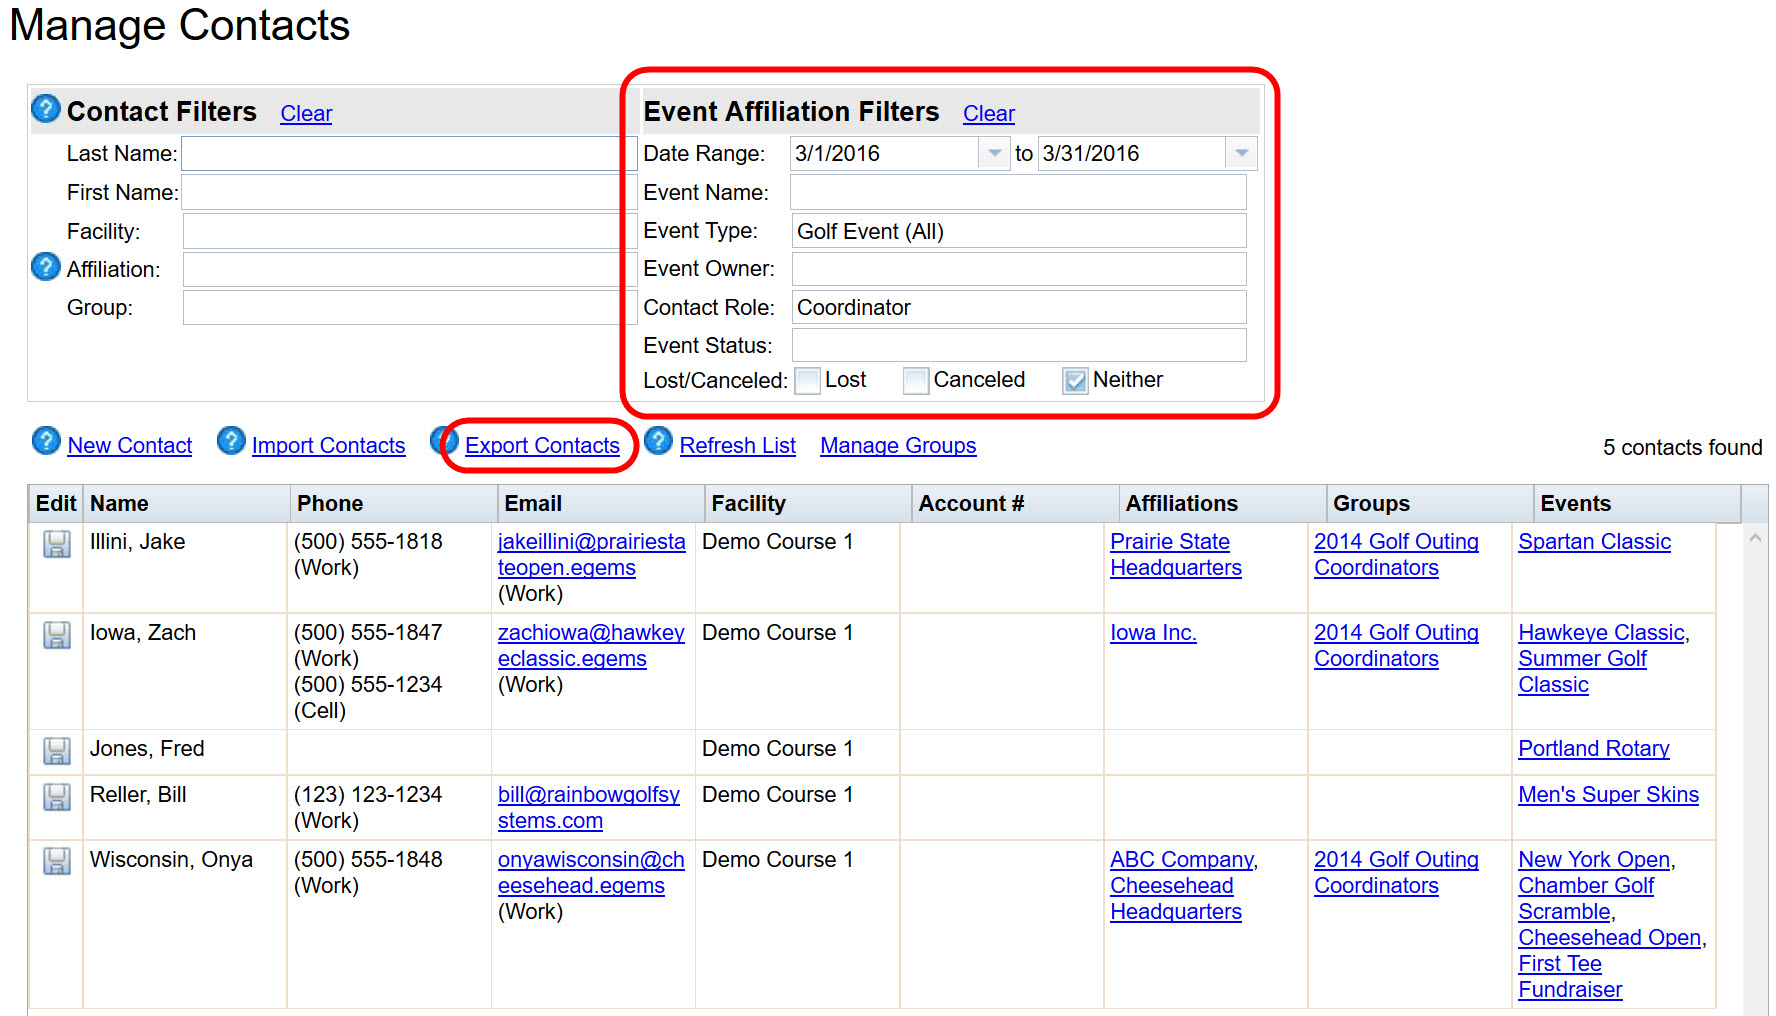
Contact Filters allow you to find and export a customized list of contacts, based on a variety of event-related filters. For example, you can export a list of all brides who have or had weddings at your facility during a specified date range. Such an export can be useful if you are looking to create a mass mailing such as Holiday Cards or Thank You Cards, or create an email list.
To use the contact filters, use the left side menu to visit the Manage Contacts page. You will notice the event filters on the right side of the page, as well as an export button:
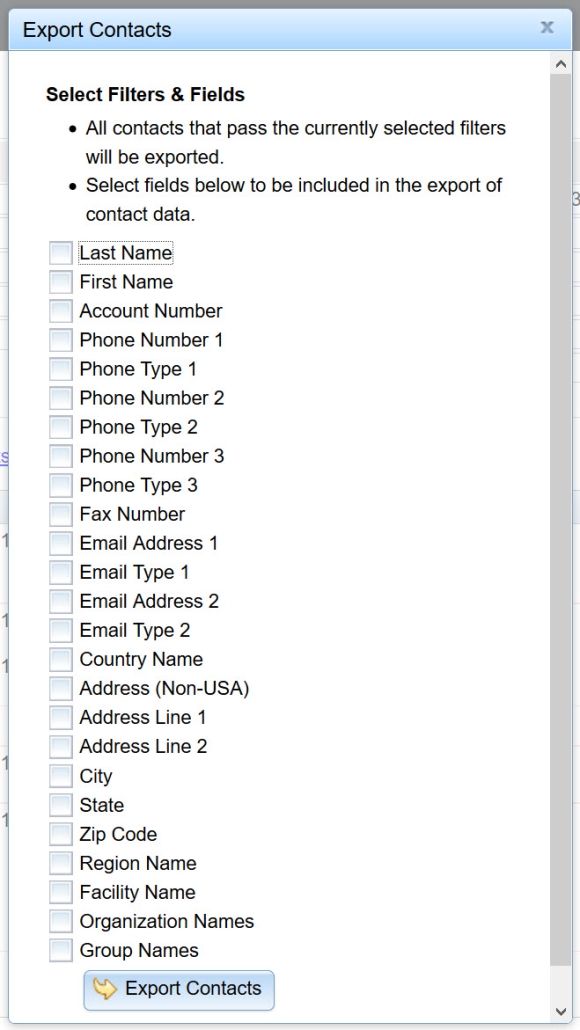
When you click “export”, you will be prompted to select which fields should be included in your excel export:
Internet Calendars allow you to sync your EventPro360 calendar (or parts of it) to other calendars including your Outlook calendar, mobile phone calendar, web site calendar, and more.
First, you must create your internet calendar in EventPro360. If you have already created an internet calendar, and just need to sync the calendar to your device, you can pass over this first portion of the tutorial and skip to step #3.
Step 1: To create an internet calendar, visit the calendar page in EventPro360. Use the Display Options and Filters on the left side menu to build your desired calendar:
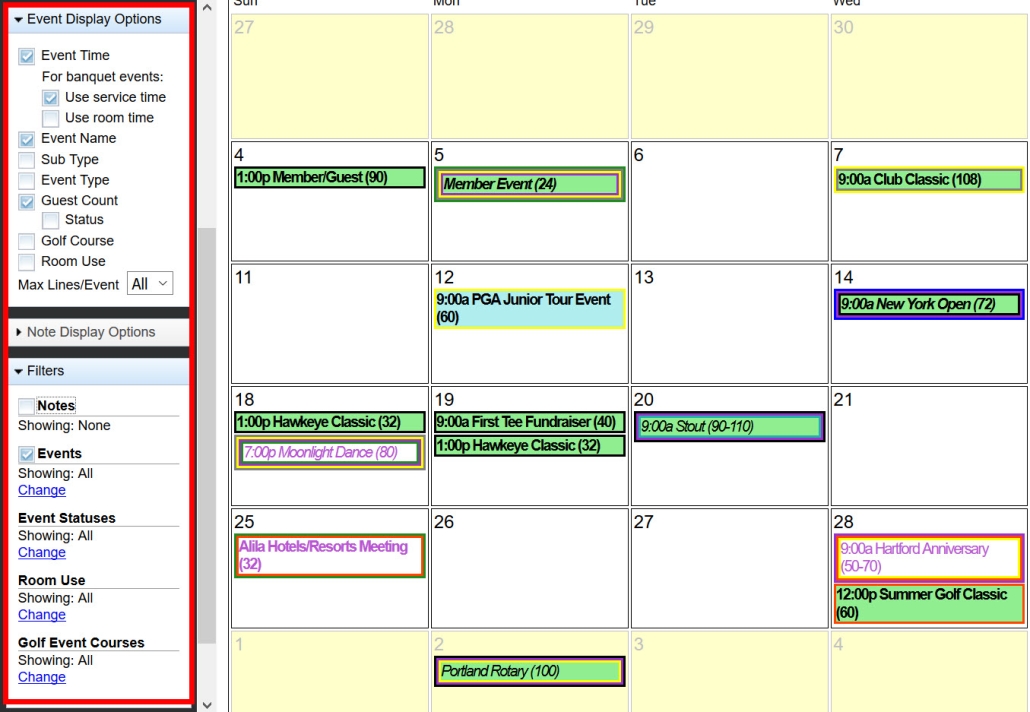
Internet calendars do not have color, so make sure to include room use in your display options if you want to see what rooms are being used by events.
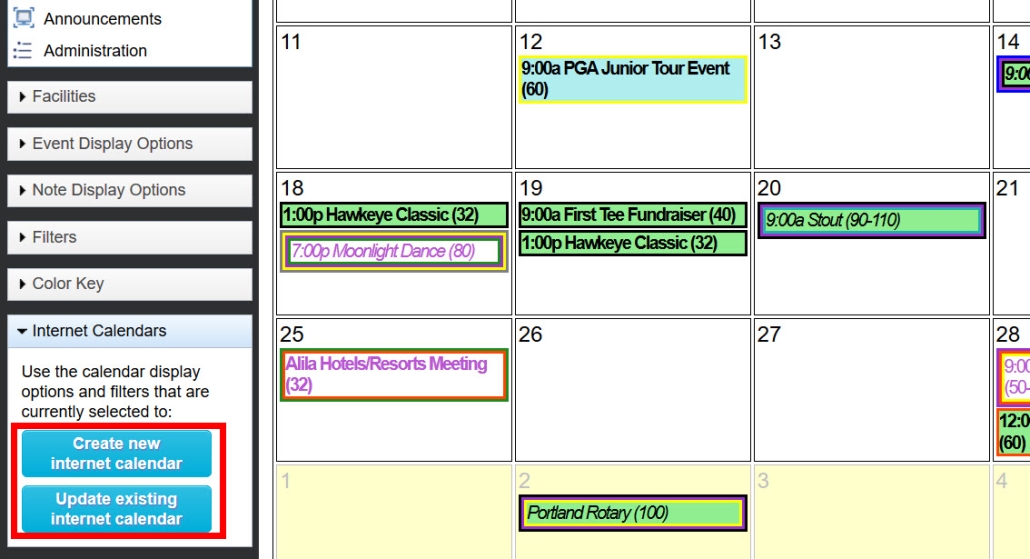
Step 2: Once you are ready to create the calendar, use the appropriate button as shown below to create a new calendar or update an existing calendar:
Step 3: Find your calendar links:
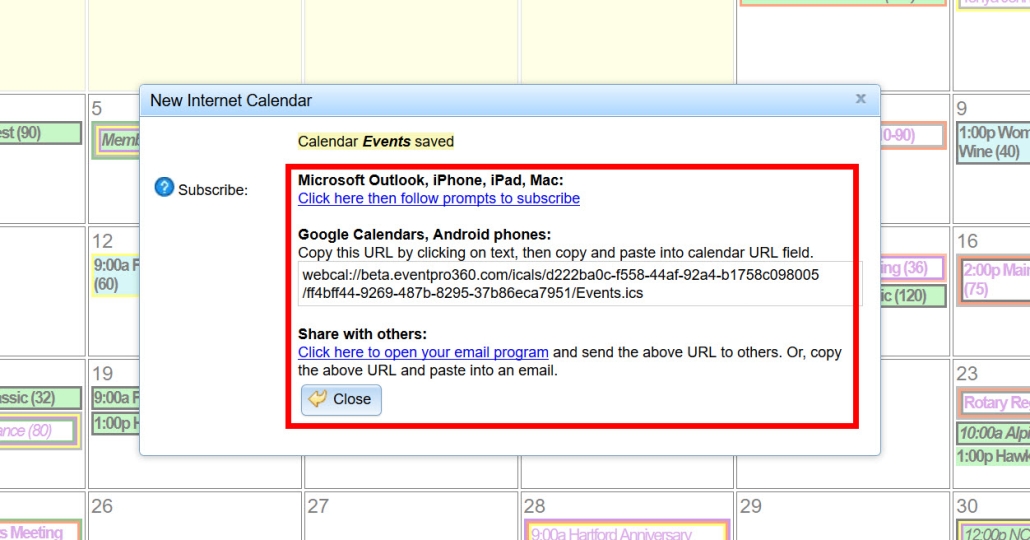
If you have just created or updated a calendar, you will receive a pop-up window with the options for subscribing to the calendar:
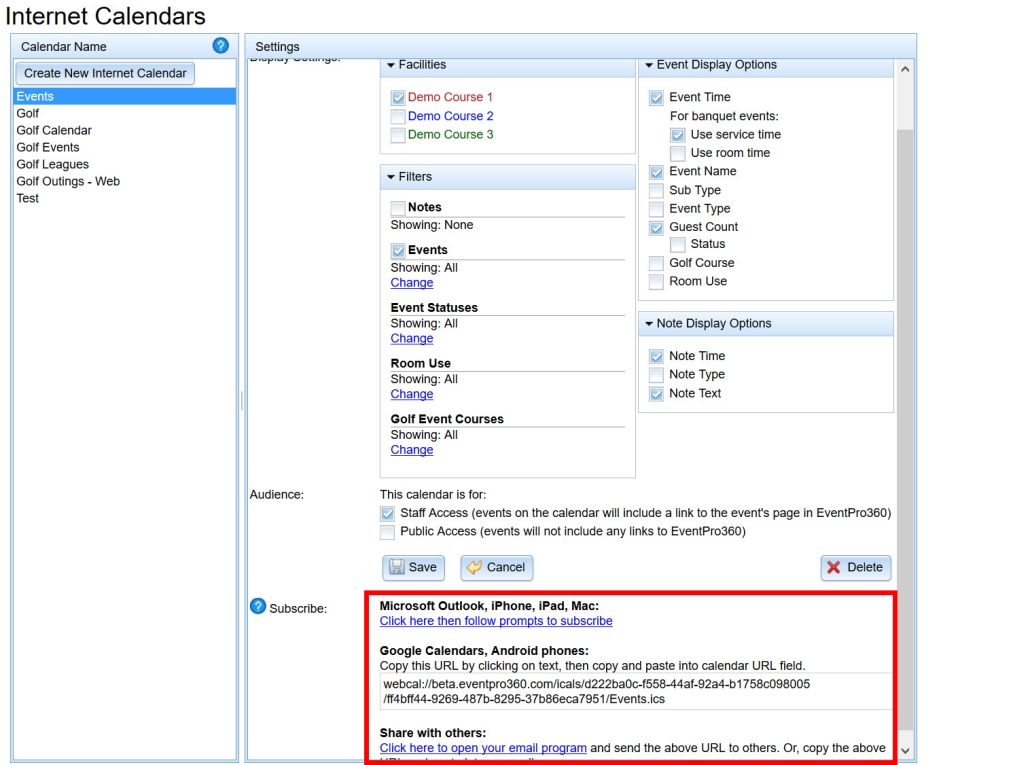
If your calendar was previously created and you just need to subscribe to it, you must visit the left side menu and click Administration, then Internet Calendars. Click on the calendar name that you wish to subscribe to, and find the links at the bottom of the page:
Step 4: Subscribe to the calendar:
Microsoft Outlook, iPhone, iPad, or Mac Calendars: Click on the first link shown and follow the prompts on your screen. Or if it’s easier, copy the URL that starts with webcal:// and paste it into an email, and send yourself the email. Open the email, click on the link, and follow the prompts on your screen.
Google Calendar: Copy the URL that starts with webcal://. Open your Google Calendar and locate the Other Calendars text on the left side. Click on the arrow next to Other Calendars and select Add by URL. Paste the webcal URL into the box and click Add Calendar.
Android Phones: You must first follow the Google Calendar steps above before the calendar can be added to your Android Phone! Make sure you follow the steps above for the Google account that you have access to on your Android Phone. Once these steps are completed, you must visit your phone calendar app and enable the calendar you just added. You may need to refresh your Google calendar account from your phone in order to get the newly added calendar to appear as an option to view.
To properly use Flags and Touches, it is important to understand the difference between them:
Flags offer a way to communicate important event information to fellow staff members. For example, the guest count changes just a few days prior to the event. You create a Flag by typing a quick note, and EventPro360 emails the Flag notice to the appropriate staff members and tracks who has acknowledged and “cleared” the Flag.
Touches offer a way to track your communication with event contacts, and to remind yourself when you need to follow up next with contacts. EventPro360 reminds you when you have Touches due.
Once you begin using Flags and Touches, you will receive email notifications, as well as visual cues within EventPro360:
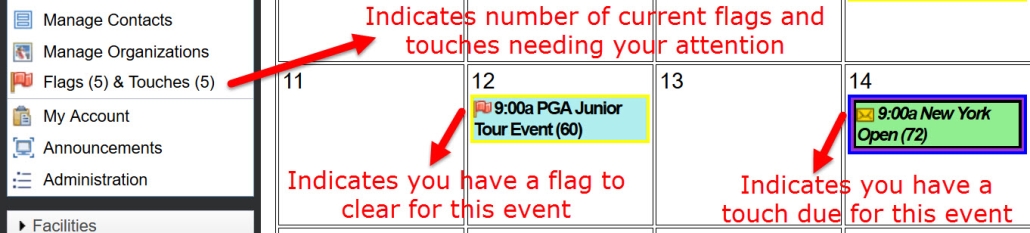
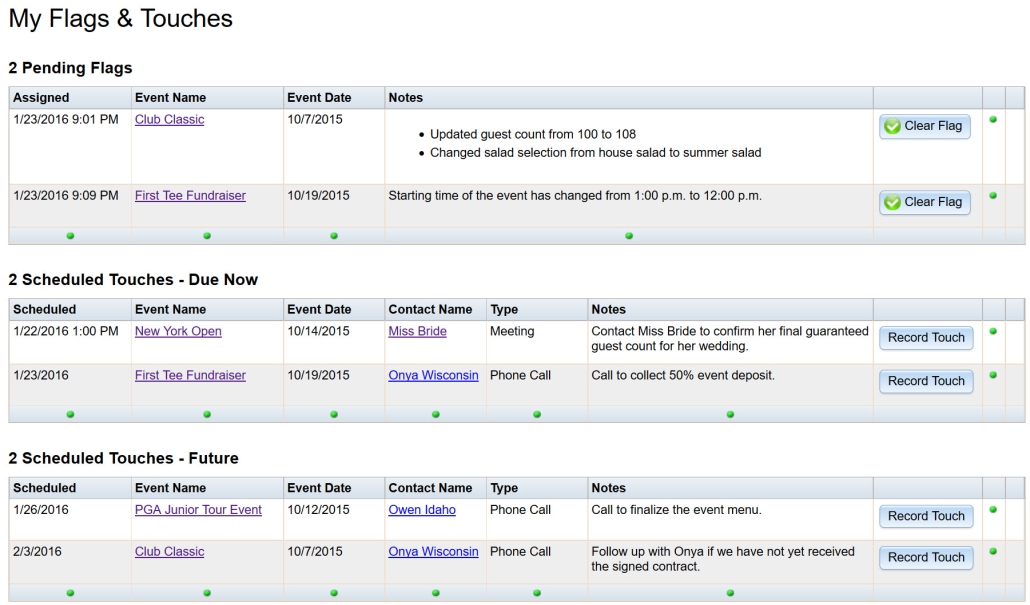
Clicking on the Flags & Touches link as show above will take you to a page listing all of your Pending Flags and Scheduled Touches:
To create a Flag, open an event page. Click on the Flag button in the upper left corner:
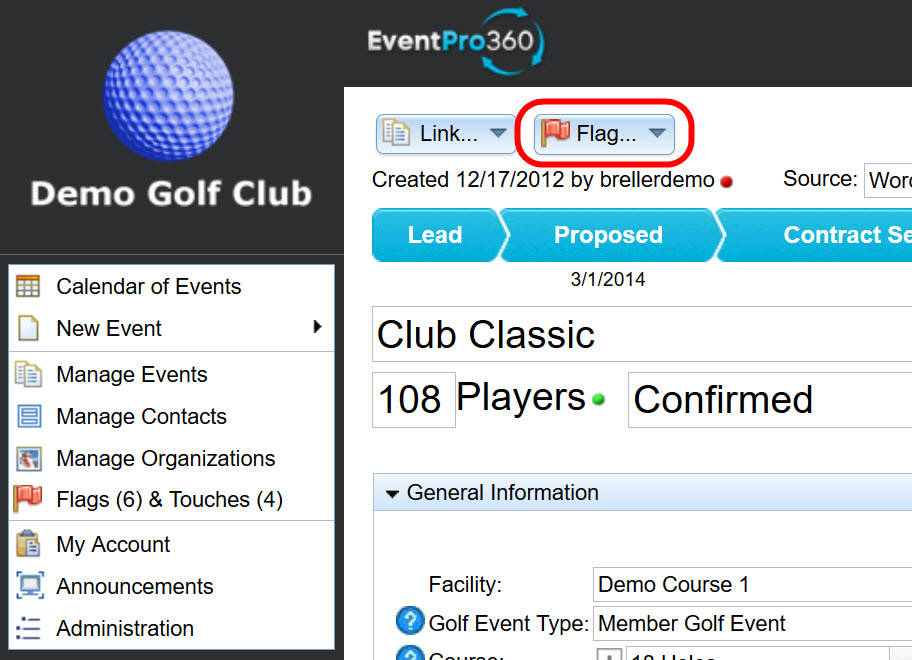
When you click to create a new Flag, you will see the Flag window:
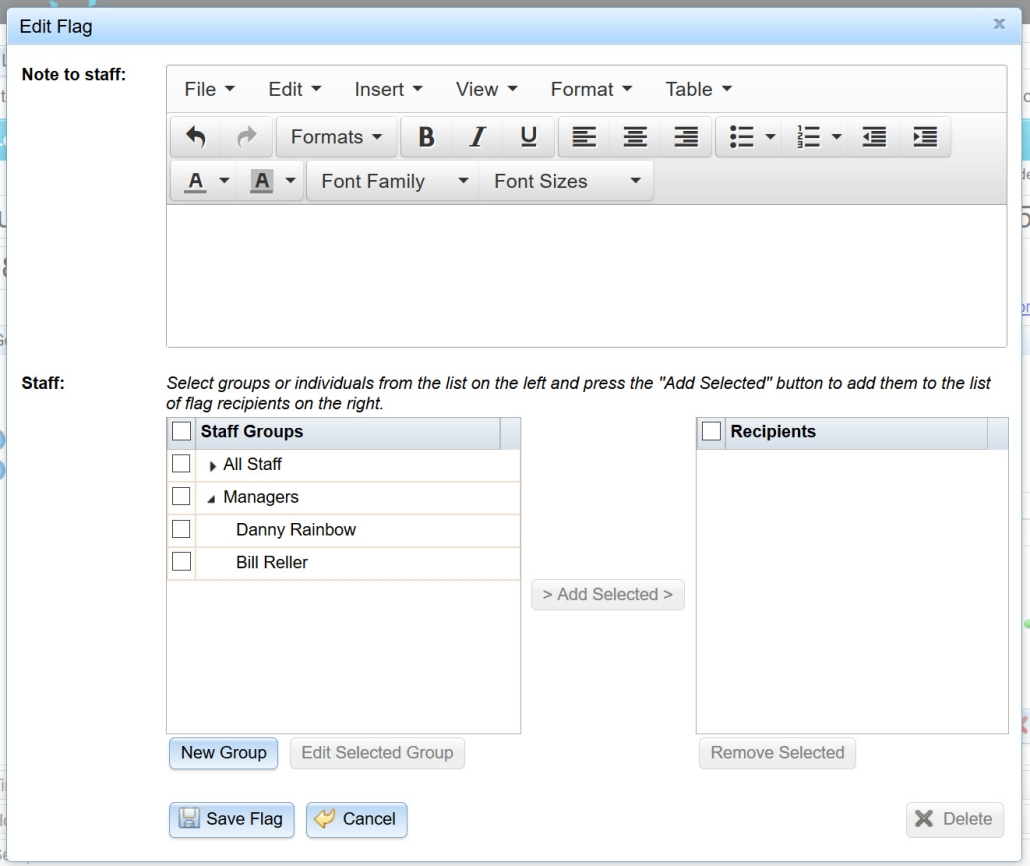
On the top portion of the window, type your note to other staff. Use the boxes on the lower portion of the window to select the recipients of the Flag. Notice that you can create groups of staff members using the New Group button, for quick access in the future.
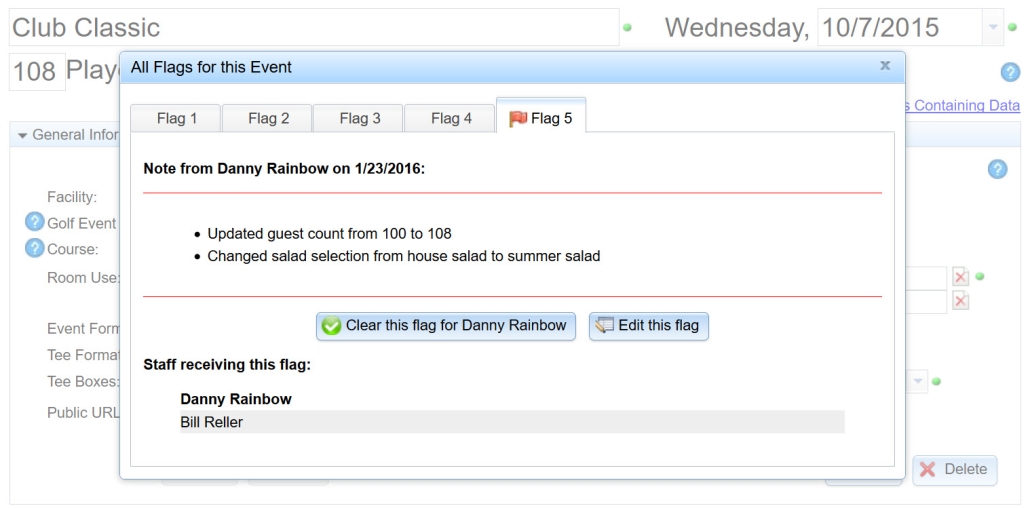
Once the Flag has been saved, it is immediately emailed to the selected recipients. The recipients will also see the Flag Icon next to the event on the calendar. When recipients open the event, the Flag will pop up:
Touches are based in the Event Contacts portion of the event page. Opening the Event Contacts section, you will see a summary of each contact’s Touches:
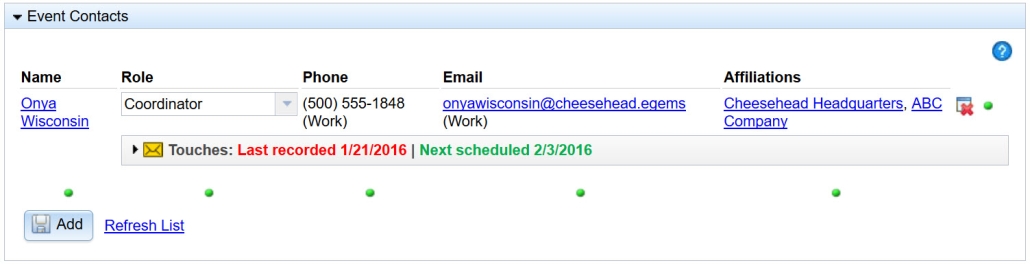
Clicking on the Touches bar will expand it to show more details about the Recorded Touches and Scheduled Touches:
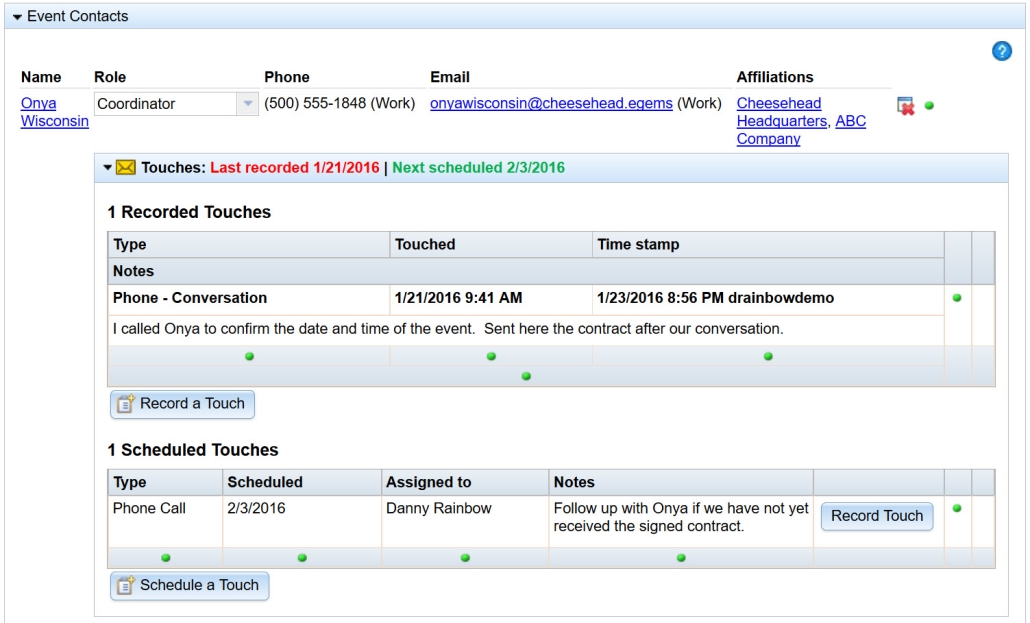
Use the Record Touch button to log a touch with the contact, or use the Schedule a Touch button to schedule a Touch for a future date/time, or assign a future Touch to another staff member. When a Touch is due, the appropriate staff member will be reminded via email and by seeing the Touch Icon next to the event on the calendar.
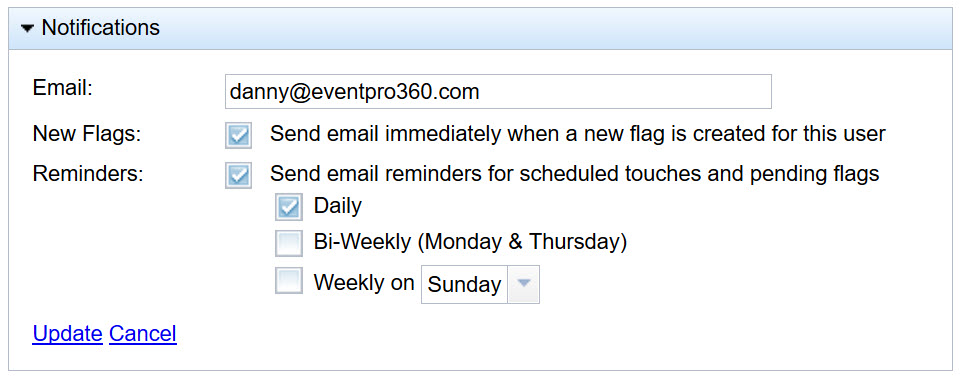
If you wish to modify your Email Notification Settings, click on My Account in the left side menu, and edit the settings as desired:
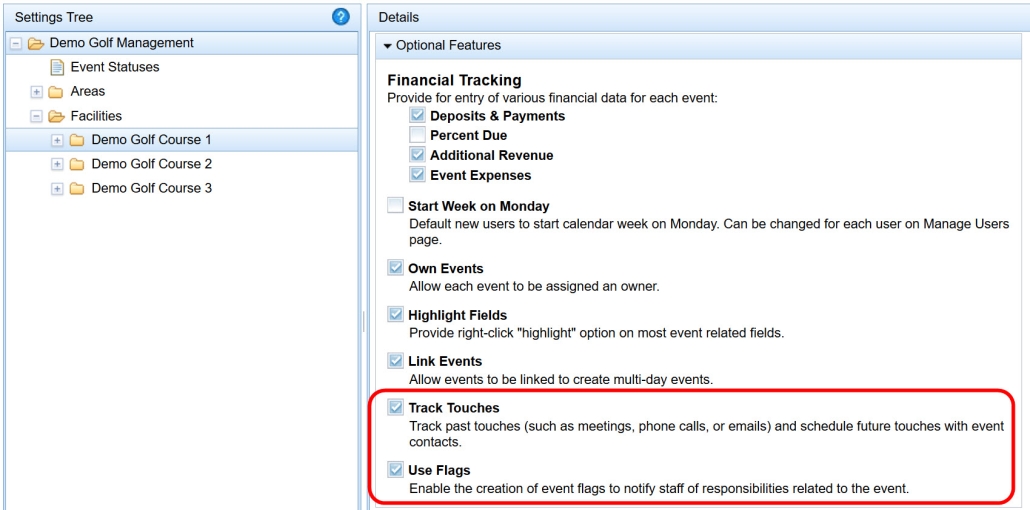
If you wish to disable the Flags or Touches feature for your facility, click on Administration in the left side menu, then Manage Settings. Locate the Optional Features pane as shown below and uncheck the features to disable them:
The multi-day events feature allows you to link multiple events together for the purpose of producing documents that show charge totals and/or room and course usage for a multi-day event. This feature also makes it easy to navigate between days of a multi-day event.
In order to use the multi-day events feature, you must first turn it on. Visit the Manage Settings page by clicking Administration, then Manage Settings. Click on your facility in the left pane, then click on Optional Features in the right pane. Check the box as shown below, and click Save:

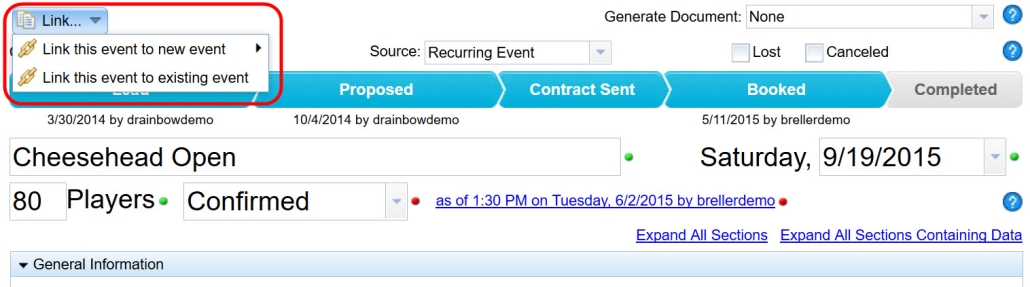
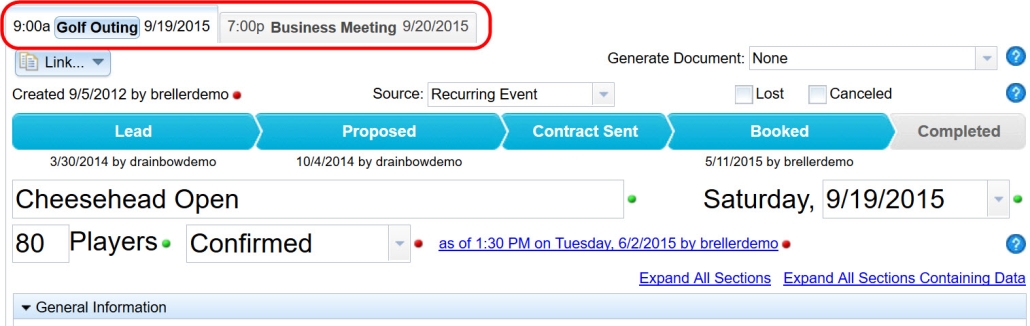
Now that the feature has been turned on, you will notice a new button on the top of each event page as shown below. Use the link button to link the current event to a new event or to an existing event:
Once two or more events have been linked together, you will see tabs across the top of your event page. Each tab represents an event; clicking on a tab will bring you to that day or portion of the event. If you wish to rename a tab, just click on the text located in the tab:
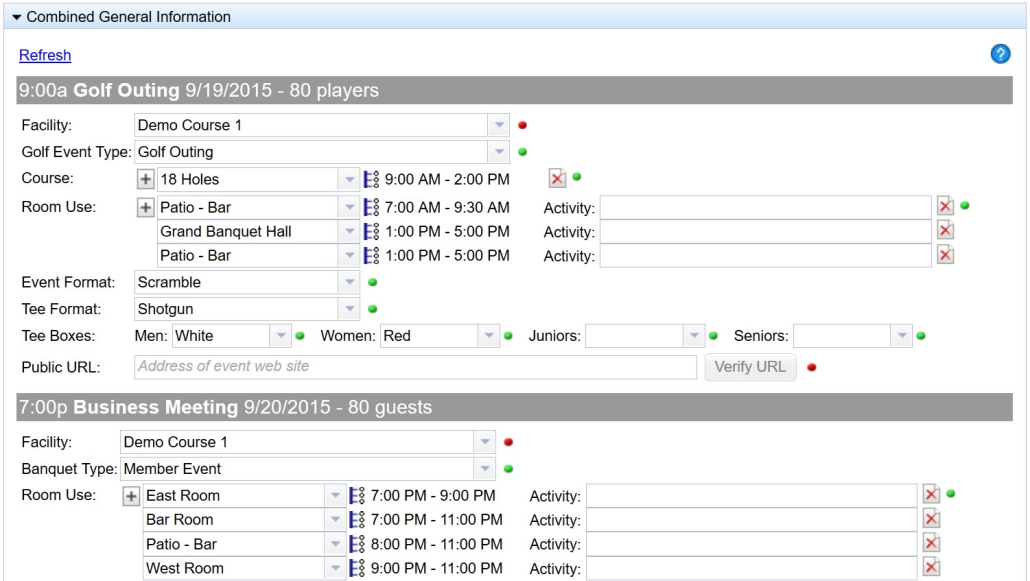
Once two or more events have been linked together, you will find two new sections on each event page for the linked events. The first new section is Combined General Information. As shown below, this section displays the general information from both linked events:
The second new section is Combined Summary of Charges. This section has both a detailed view or summary view option. Both options include a totals section at the bottom, which provides grand total charges for all days of the event:
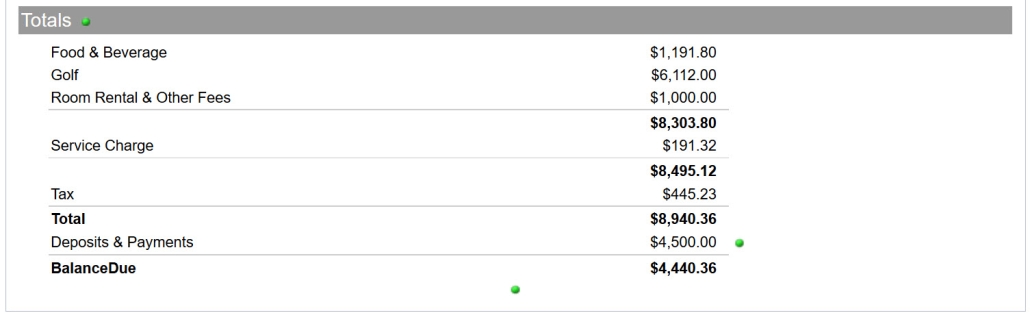
Using these two new sections, you can create document templates that will display the combined general information and/or combined summary of charges sections. This will allow for creation of event proposals, contracts, invoices, etc. for multi-day events.
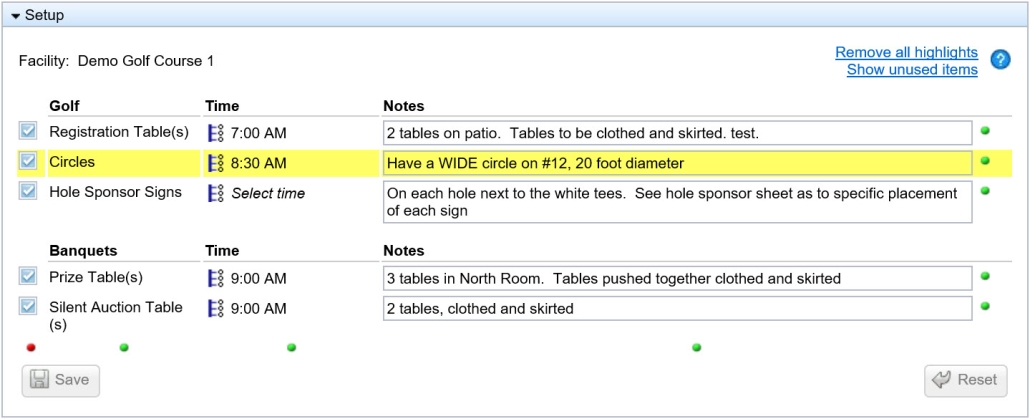
The highlight feature allows you to apply yellow highlighting to portions of an event page. You may use the highlighting for any purpose, but in most cases, a highlight will indicate that the highlighted item needs further attention. When an event is copied, all fields on the copied event are automatically highlighted. They can be un-highlighted as details for the copied event are confirmed.
To highlight a field on an event page, simply right click on the desired field and check the “Highlight” box. The field will highlight as shown below:
Removing highlights is just as easy. Simply right click and uncheck the “Highlight” box. In addition, each section has a button in the upper right corner that can be used to “Remove All Highlights” from that section.
The event owning & coordinating feature allows you to assign an “owner” and/or “coordinator” to each event. Event owning can be used for the purpose of tracking which sales person is credited for each event, or which event manager is responsible for coordinating each event.
If you wish to use the event owning & coordinating features, you must first turn it on. To turn on this feature, click on Administration, then Manage Settings. Click on your facility name in the left pane and in the right pane, expand the location section. In the location section, check the box(es) shown below to turn on owning and/or coordinating of events:
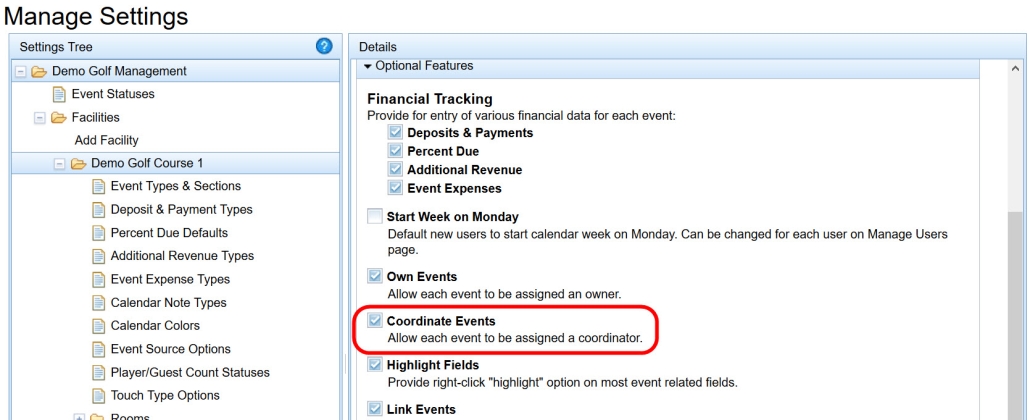
Once event owning & coordinating is turned on, you will be able to set an owner and coordinator for each event using the drop-down box at the top of the event page:

The timeline feature allows you to combine items from several different areas of the event page into a single event timeline overview. Here is how the feature works:
There is a timeline icon that appears next to each item that is capable of having a time assigned to it. The icon is circled in red below:

If the icon is lit up, that item will appear in the Event Timeline section, as long as it has a time designated. You can click on the timeline icon to toggle on/off whether the item should appear in the timeline for the current event.
The timeline section will take all items that have the timeline icon activated, and will show them in the Event Timeline section. In this section, there is also an option (at the bottom) to add items to the timeline for the current event. Just type in the text that you want to display on the timeline and click the button:
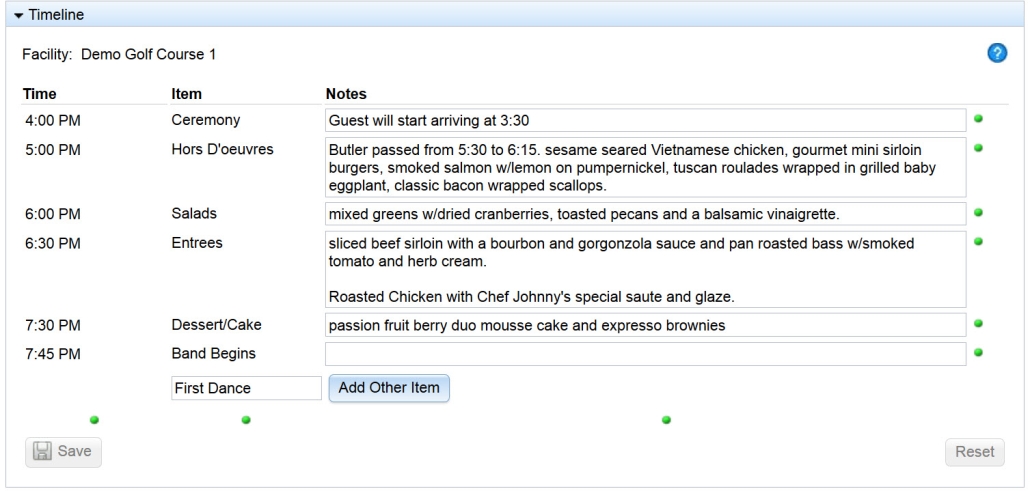
Please note that you can edit times and notes of items in the timeline section. When you do this, the time and notes will also be updated in the section where that item is stored.
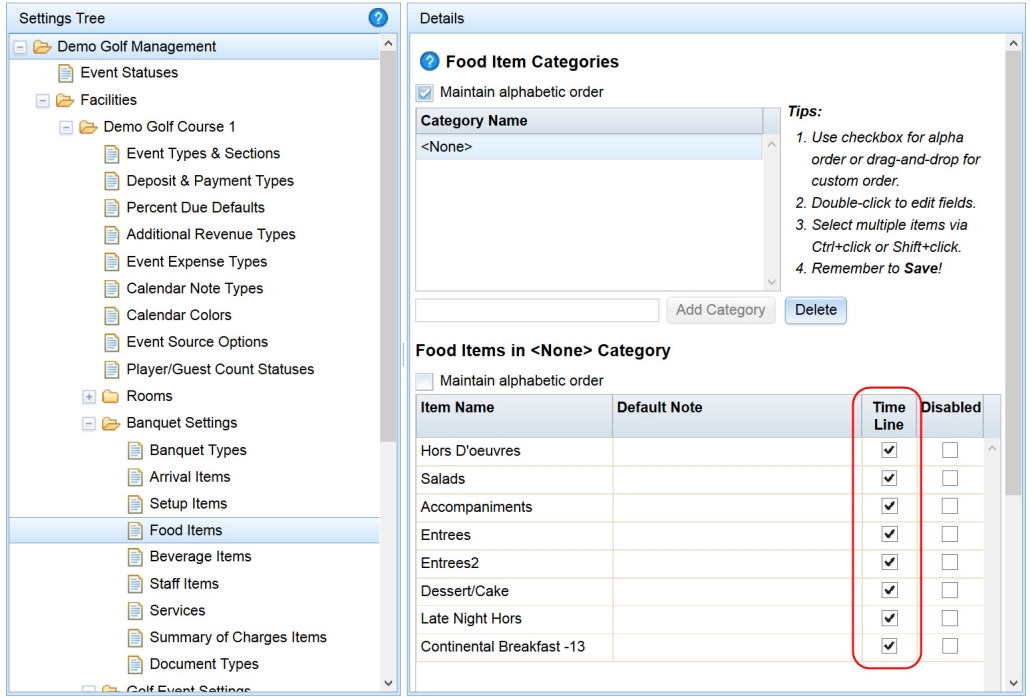
On the Manage Settings page, you can specify whether each of your items should be a considered a timeline item by default. In the column shown below, if the box is checked, the item’s timeline icon will always be activated by default. Of course, the timeline icon for each item can be toggled on/off on an individual event basis:
Make sure to watch this video first, as it will give you an idea of the overall structure of the document feature and some of its capabilities. Then, see the videos below for more detail on specific aspects of the feature.
This video walks you through the first step you will need to take in preparation for creating your document templates. Current users who have set up page headers are already familiar with this step.
A good introduction to some basic concepts of the document feature, and how you can incorporate your existing data sections into a customizable document.
This video will show you how to begin organizing and structuring your document. Custom sections and blocks are vital to creating efficient document templates.
Custom text blocks allow you to add any desired text to your document templates, perfect for contract terms and conditions, proposal text, confirmation letters, thank you letters, etc.
Custom data blocks allow you to pull event data (such as food details, setup details, charges, etc.) into a full width, half width, or third width column that can then be further customized.
Make sure to watch this video first, as it will give you an idea of the overall structure of the document feature and some of its capabilities. Then, see the videos below for more detail on specific aspects of the feature.
The version function allows you to make edits to your documents and save them for a specific event, so that the document version can be easily accessed in the future.
These document examples provide a glimpse of what kinds of templates can be created in EventPro360, and what kinds of documents can be automatically generated by the system. Remember, these documents can be customized to meet the needs of your facility. View the document feature videos for instructions on how to create and customize document templates. Click on a document example to view it in more detail.